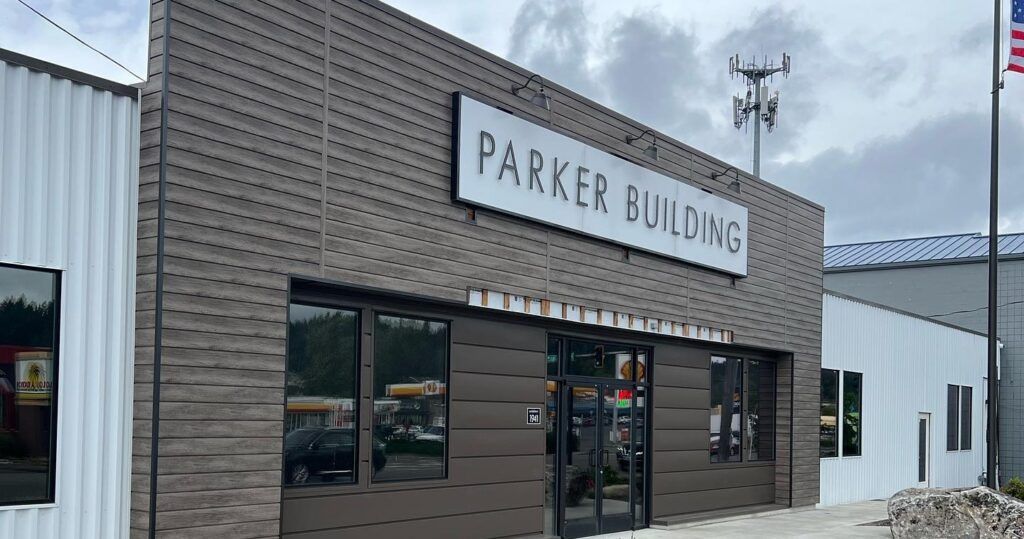
Why Storefront Glass Needs Protection Your storefront windows are a powerful draw, showcasing your products and inviting customers into your business. But they’re also vulnerable to heat, glare, UV damage, and even break-ins, which can harm your inventory and drive up costs. At Ultimate Window Tinting , we understand these challenges and offer an affordable, non-intrusive solution: window films. These advanced films protect your business while enhancing its appeal. In this guide, we’ll explore three main types of window film —Security, Solar Control, and Decorative—and how they safeguard your storefront, boost efficiency, and elevate your brand, ensuring your business thrives in any season. Type 1: Safety & Security Film (Physical Protection) Safety and Security Films are designed to fortify your storefront against physical threats, acting as a robust barrier to protect your business. Made from thick, durable PET material (8 Mil or higher), these films hold shattered glass together during impacts from vandalism, attempted break-ins, or severe weather, preventing dangerous shards and slowing down intruders. Often paired with an Edge Retention System to anchor the film to the window frame, they create a time-delay deterrent, giving staff or police critical time to respond during “smash-and-grab” attempts. These films are ideal for high-value retail like jewelry or electronics stores, banks, or businesses in high-risk areas, ensuring peace of mind and asset protection. Type 2: Solar Control & Energy Reduction Film (Comfort and Efficiency) Solar Control Films tackle heat, glare, and UV radiation, making your storefront more comfortable and cost-efficient. These films block up to 80% of solar heat, keeping your interior cool and reducing strain on HVAC systems—crucial for hot summers. They also cut glare, improving visibility for staff working on screens and making products easier to view for customers. By stopping over 99% of harmful UV rays, they prevent fading of merchandise like clothing, furniture, or display materials, preserving their value. Perfect for restaurants, commercial offices, or boutiques, Solar Control Films lower energy bills and create a welcoming environment, boosting both comfort and savings. Type 3: Decorative and Privacy Film (Aesthetics and Branding) Decorative Window Films transform your storefront’s appearance while adding functionality, offering a stylish way to increase privacy and reinforce your brand. Options like frosted window film obscure views into sensitive areas like a conference room , making it ideal for offices or medical facilities needing confidentiality. Decorative window film can be customized with patterns, logos, or brand colors, mimicking the look of etched or sandblasted glass at a fraction of the cost—perfect for creating a professional vibe. For complete privacy, blackout window film or whiteout window film blocks all visibility, ideal for secure spaces or bold aesthetic statements. These films suit businesses seeking visual separation or a branded storefront that stands out. Dual-Purpose Solutions: Getting More from Your Film Why choose just one benefit? Hybrid films combine advantages, like tinted security films that block heat while reinforcing glass, or frosted films that enhance privacy and reduce UV damage. Selecting the right multi-purpose film can be tricky, as it involves balancing security, light transmission, and aesthetics. That’s where Ultimate Window Tinting’s expertise comes in. Our professional consultations assess your storefront’s needs, ensuring you get a film that delivers maximum protection and style without compromise. This tailored approach saves you money by addressing multiple concerns with a single installation. How to Choose the Right Tint for Your Business Picking the perfect window film starts with three simple steps: Define Your Primary Goal : Decide if security (e.g., protecting high-value inventory), energy savings (reducing HVAC costs), or aesthetics (branding or privacy) is your top priority. Inventory Assessment : Evaluate how valuable or visible your merchandise is from the street. High-value items like electronics may need thicker security films, while display-heavy stores benefit from UV-blocking solar films. Budget and ROI : Window films offer excellent return on investment by cutting energy bills (up to 30% savings) and preventing costly damage from break-ins or fading. Consider long-term savings when setting your budget. Our team at Ultimate Window Tinting can guide you through these steps to find the ideal solution for your storefront. Next Steps To Security and Privacy Window films are a game-changer for storefronts, offering tailored solutions to protect and enhance your business. Security Films shield against break-ins and storms, Solar Control Films save energy and protect inventory, and Decorative Window Films boost privacy and branding with options like frosted, blackout, or whiteout films. Whether you need to secure a conference room, reduce glare, or create a stunning visual, there’s a film for you. Don’t guess—get expert advice to ensure your storefront is ready for any challenge. Ready to reinforce your storefront? Contact Ultimate Window Tinting today for a personalized, on-site consultation and quote. Call us at (912) 555-7890 or visit www.ultimatewindowtinting.com to schedule your appointment. Protect your business and elevate its appeal with our winter-ready specials!
Commercial window tinting involves applying a thin film to the windows of business properties to enhance functionality and appearance. This specialized treatment offers businesses a range of benefits, from energy savings to improved security and aesthetics. Choosing the right window tint is critical for maximizing these advantages, as the wrong choice can lead to inefficiencies or unmet needs. This article explores the key benefits of commercial window tinting, the types available, factors to consider, and industry-specific recommendations to help business owners make informed decisions. Benefits of Commercial Window Tinting Window tinting provides multiple advantages for commercial properties. Energy Efficiency : Tinted windows reject solar heat, reducing the need for air conditioning and lowering energy bills by up to 15%, according to some studies. UV Protection : Tints block up to 99% of harmful UV rays, preventing fading of furniture, flooring, and merchandise while protecting occupants from skin damage. Glare Reduction : By minimizing glare, tints improve visibility for screens and create a more comfortable environment for employees and customers. Increased Privacy : Tints obscure visibility from the outside, safeguarding sensitive areas like offices or meeting rooms. Enhanced Security : Security films strengthen windows, making them resistant to break-ins or accidental shattering. Improved Aesthetics : Tinted windows offer a sleek, uniform look that can align with a company’s branding. Types of Commercial Window Tint Several types of window tint cater to different business needs. Solar Control Film : Designed to reduce heat and UV exposure, this film is ideal for buildings in sunny climates, offering energy savings and comfort without sacrificing natural light. Reflective/Mirrored Film : This type reflects sunlight for excellent heat rejection but may create a mirrored appearance, which suits modern buildings but can be less desirable for traditional aesthetics. Ceramic Window Film : A premium option, ceramic films provide superior heat rejection and clarity without reflective drawbacks, perfect for businesses prioritizing performance and visibility. Security Film : Thick and durable, security films reinforce windows against break-ins, vandalism, or impact, and are often used in high-risk areas. Decorative/Frosted Film : These films add privacy and style, with customizable patterns or branding, ideal for retail or office spaces seeking a unique aesthetic. Factors to Consider When Choosing Tint Selecting the right window tint requires careful evaluation of several factors. Building Location and Climate : Buildings in hot, sunny regions benefit from high-performance solar or ceramic films, while cooler climates may prioritize UV protection. Window Orientation and Size : South-facing or large windows may need stronger heat-rejecting tints. Business Type and Needs : Retail stores may prioritize visibility, while offices may focus on privacy. Desired Level of Privacy and Security : Sensitive spaces like healthcare facilities require higher privacy levels. Local Regulations and HOA Restrictions : Some areas have rules on tint reflectivity or darkness, so compliance is essential. Budget Constraints : Basic solar films are cost-effective, while ceramic films are pricier but offer long-term value. Aesthetic Preferences : Tints should complement the building’s design and brand identity. Industry-Specific Recommendations Different industries have unique tinting needs. Office Buildings : Solar or ceramic films reduce energy costs and glare, enhancing employee productivity. Retail Stores : Decorative or lightly tinted films maintain visibility for displays while offering UV protection for merchandise. Healthcare Facilities : Privacy-focused frosted or security films protect patient confidentiality and safety. Restaurants and Hospitality : Solar or frosted films create a comfortable ambiance while controlling heat and glare. Educational Institutions : Security and UV-protective films ensure student safety and protect classroom materials from fading. The Importance of Professional Installation Professional installation is critical for achieving optimal results with commercial window tinting. Certified installers ensure precise application, preventing bubbles, peeling, or uneven coverage that can compromise performance and aesthetics. Without professional installation, these issues can lead to reduced energy efficiency, compromised security, and a less professional appearance. Common mistakes, such as improper surface preparation or incorrect film cutting, can reduce the tint’s lifespan or effectiveness. Professional services also often include warranties, covering issues like fading or delamination, and provide aftercare guidance to maintain the tint’s condition, ensuring long-term value. Cost vs. Value The cost of commercial window tinting varies by film type and project scope, but the investment often yields significant returns. Basic solar films may cost $5–$8 per square foot, while premium ceramic or security films range from $10–$15 per square foot. Long-term savings from reduced energy bills—potentially hundreds or thousands annually for large buildings—offset upfront costs. Additionally, tints extend the life of interior furnishings by preventing UV damage, adding further value. Businesses should weigh initial expenses against these savings and durability benefits. Conclusion Choosing the right commercial window tint is a strategic decision that enhances energy efficiency, security, privacy, and aesthetics for businesses. By carefully considering building needs, industry requirements, and tint types, owners can select a solution that delivers both immediate and long-term benefits. Consulting with a professional tinting specialist ensures proper selection and installation, maximizing return on investment. Business owners are encouraged to evaluate their specific needs and contact a local tinting expert for a consultation to explore tailored options. Don’t wait, take the first step towards a more efficient and secure business environment today!
Commercial buildings are changing as new technologies make them smarter, more energy-efficient, and comfortable to work in. From advanced lighting systems to improved insulation, businesses are looking for ways to create a better environment for employees and visitors. These technologies also help companies save money and keep up with new regulations. One modern solution that is gaining popularity is window tinting for commercial buildings. Adding window tint is a simple and effective way to improve many aspects of a building. It offers immediate and long-lasting benefits , making it a smart investment for business owners who want to be ready for the future. What is Building Window Tinting? Building window tinting means applying thin films to the inside of a building’s windows. These films can do a lot more than just give the glass a darker shade. They help control sunlight, reduce glare, and protect people and items inside from harmful rays. There are several types of window films. Solar control films block heat and UV rays, making interiors more comfortable. Decorative films add patterns and colors for style or privacy. Safety and security films make windows harder to break, offering extra protection. Recently, window film technology has advanced a lot, with smarter films that can adjust to sunlight, last longer, and look better than ever before. Energy Efficiency and Cost Savings Window tinting can help cut down on energy use by blocking some of the sun’s heat from entering a building. This means air conditioning systems don’t have to work as hard, especially in the summer. By reducing the load on HVAC systems, businesses can see a noticeable drop in their energy bills. Many commercial buildings have reported real savings after installing window films. These savings add up year after year. Plus, using less energy makes buildings more eco-friendly and helps businesses earn points for green building programs, contributing to a cleaner environment. UV Protection and Interior Preservation Many people do not realize that sunlight brings more than just brightness. Ultraviolet (UV) rays can fade carpets, furniture, and artwork, and even cause damage to electronic equipment. Quality window tints block up to 99% of UV rays, which helps protect everything inside. This protection is especially important in buildings with large display windows or in offices with lots of sunlight. By stopping UV damage, window tint helps companies protect their investments in furnishings and equipment, keeping them looking newer for longer. Enhancing Comfort and Productivity Tinted windows help keep indoor temperatures steady by reducing hot spots and glare from the sun. Employees are less distracted by harsh light, and rooms stay cooler on sunny days. When people feel comfortable, they can focus better and are more productive. Daylight optimization—letting in enough natural light while blocking the downsides—creates a pleasant work environment while still keeping energy costs under control. All these factors together help businesses create healthier, more efficient workplaces. Security, Privacy, and Safety Benefits Some commercial spaces need extra privacy, like conference rooms or healthcare offices. Window films can make glass more private without blocking all the light. There are also safety films designed to hold glass together if it shatters, making break-ins or accidents less dangerous. Added safety is not just for peace of mind. Many local building codes require safety and security features for commercial glass. Window films help businesses stay compliant with these regulations, increasing protection for both people and property. Aesthetic and Branding Opportunities Window tinting isn’t just functional. It can be designed to look good, too. Tints come in different shades, colors, and patterns, making it easy to match a company’s brand or add modern style. Some films can even include custom logos or images. A well-designed tint can improve a building’s curb appeal, helping to attract tenants, shoppers, or clients. Both interiors and exteriors can use decorative and branded films to make spaces unique and memorable. Preparing for Future Regulations and Standards Laws about building efficiency and energy use are expected to get stricter in the coming years. By adding energy-saving upgrades like window tint now, businesses can get ahead of new rules and avoid costly updates later. Window tinting can also help buildings earn credits toward certifications like LEED (Leadership in Energy and Environmental Design). These certifications are important for businesses focused on sustainability and for meeting local or industry standards. Choosing the Right Window Tint for Your Building Selecting the best window tint involves several factors . Consider your local climate, which direction your building faces, and your main goals, like saving energy, protecting interiors, or adding privacy. A professional installer can help suggest the best type of film for your needs. It’s important to ask about warranties and how long each film is expected to last. Working with reputable installers means you get the right advice, safe installation, and support for years to come. Conclusion Window tinting is a simple yet powerful way to upgrade commercial buildings for the future. It cuts energy costs, blocks harmful rays, adds comfort and safety, and supports business branding and green goals. Investing in quality window tint now can prevent higher expenses later and helps your building handle any new standards or regulations that may come. If you’re ready to explore these benefits, talk to a professional commercial window tinting expert. They can help assess your building’s needs and recommend the best solutions to future-proof your property. https://www.3m.com/3M/en_US/p/c/business-window-tinting/ https://www.energy.gov/energysaver/update-or-replace-windows https://www.usgbc.org/credits/new-construction/v4/mrc1
Commercial buildings are changing as new technologies make them smarter, more energy-efficient, and comfortable to work in. From advanced lighting systems to improved insulation, businesses are looking for ways to create a better environment for employees and visitors. These technologies also help companies save money and keep up with new regulations. One modern solution that is gaining popularity is window tinting for commercial buildings. Adding window tint is a simple and effective way to improve many aspects of a building. It offers immediate and long-lasting benefits , making it a smart investment for business owners who want to be ready for the future. What is Building Window Tinting? Building window tinting means applying thin films to the inside of a building’s windows. These films can do a lot more than just give the glass a darker shade. They help control sunlight, reduce glare, and protect people and items inside from harmful rays. There are several types of window films. Solar control films block heat and UV rays, making interiors more comfortable. Decorative films add patterns and colors for style or privacy. Safety and security films make windows harder to break, offering extra protection. Recently, window film technology has advanced a lot, with smarter films that can adjust to sunlight, last longer, and look better than ever before. Energy Efficiency and Cost Savings Window tinting can help cut down on energy use by blocking some of the sun’s heat from entering a building. This means air conditioning systems don’t have to work as hard, especially in the summer. By reducing the load on HVAC systems, businesses can see a noticeable drop in their energy bills. Many commercial buildings have reported real savings after installing window films. These savings add up year after year. Plus, using less energy makes buildings more eco-friendly and helps businesses earn points for green building programs, contributing to a cleaner environment. UV Protection and Interior Preservation Many people do not realize that sunlight brings more than just brightness. Ultraviolet (UV) rays can fade carpets, furniture, and artwork, and even cause damage to electronic equipment. Quality window tints block up to 99% of UV rays, which helps protect everything inside. This protection is especially important in buildings with large display windows or in offices with lots of sunlight. By stopping UV damage, window tint helps companies protect their investments in furnishings and equipment, keeping them looking newer for longer. Enhancing Comfort and Productivity Tinted windows help keep indoor temperatures steady by reducing hot spots and glare from the sun. Employees are less distracted by harsh light, and rooms stay cooler on sunny days. When people feel comfortable, they can focus better and are more productive. Daylight optimization—letting in enough natural light while blocking the downsides—creates a pleasant work environment while still keeping energy costs under control. All these factors together help businesses create healthier, more efficient workplaces. Security, Privacy, and Safety Benefits Some commercial spaces need extra privacy, like conference rooms or healthcare offices. Window films can make glass more private without blocking all the light. There are also safety films designed to hold glass together if it shatters, making break-ins or accidents less dangerous. Added safety is not just for peace of mind. Many local building codes require safety and security features for commercial glass. Window films help businesses stay compliant with these regulations, increasing protection for both people and property. Aesthetic and Branding Opportunities Window tinting isn’t just functional. It can be designed to look good, too. Tints come in different shades, colors, and patterns, making it easy to match a company’s brand or add modern style. Some films can even include custom logos or images. A well-designed tint can improve a building’s curb appeal, helping to attract tenants, shoppers, or clients. Both interiors and exteriors can use decorative and branded films to make spaces unique and memorable. Preparing for Future Regulations and Standards Laws about building efficiency and energy use are expected to get stricter in the coming years. By adding energy-saving upgrades like window tint now, businesses can get ahead of new rules and avoid costly updates later. Window tinting can also help buildings earn credits toward certifications like LEED (Leadership in Energy and Environmental Design). These certifications are important for businesses focused on sustainability and for meeting local or industry standards. Choosing the Right Window Tint for Your Building Selecting the best window tint involves several factors . Consider your local climate, which direction your building faces, and your main goals, like saving energy, protecting interiors, or adding privacy. A professional installer can help suggest the best type of film for your needs. It’s important to ask about warranties and how long each film is expected to last. Working with reputable installers means you get the right advice, safe installation, and support for years to come. Conclusion Window tinting is a simple yet powerful way to upgrade commercial buildings for the future. It cuts energy costs, blocks harmful rays, adds comfort and safety, and supports business branding and green goals. Investing in quality window tint now can prevent higher expenses later and helps your building handle any new standards or regulations that may come. If you’re ready to explore these benefits, talk to a professional commercial window tinting expert. They can help assess your building’s needs and recommend the best solutions to future-proof your property. https://www.3m.com/3M/en_US/p/c/business-window-tinting/ https://www.energy.gov/energysaver/update-or-replace-windows https://www.usgbc.org/credits/new-construction/v4/mrc1
Discover the ins and outs of Paint Protection Film (PPF), from its military beginnings to its role in modern automotive care. This guide covers everything you need to know about PPF, including its benefits, installation, maintenance tips and more. The History and Evolution of PPF Technology PPF technology was initially developed for military use in the 1960s to protect helicopter blades. It later evolved to become a staple in automotive protection when it was adapted for consumer use in the 1990s. Today, it is used not only for cars, but also for a variety of vehicles, including motorcycles and boats. 4 Benefits of PPF 1. Protection from Physical Damage Scratch and Impact Resistance: PPF provides a barrier against scratches and rock chips from road debris. Enhanced Paint Security: Protects paint from damage, reducing the need for costly repairs. 2. Durability and Longevity Long-lasting Protection: Quality PPF can last up to ten years, depending on care and conditions. Stable Performance: Resists degradation in various weather conditions, maintaining its protective qualities. 3. Aesthetic Preservation Visual Appeal: PPF is almost invisible and can enhance the vehicle’s appearance with a glossy or matte finish. Color Preservation: Protects against UV radiation that causes paint fading and discoloration 4. Maintenance Ease Easy Cleaning: The film’s smooth surface simplifies cleaning by preventing dirt and debris from adhering. Reduced Need for Frequent Waxing: PPF maintains its shine and protective qualities without frequent waxing. Paint Protection Film vs. Ceramic Coatings and Traditional Waxes PPF vs. Ceramic Coatings
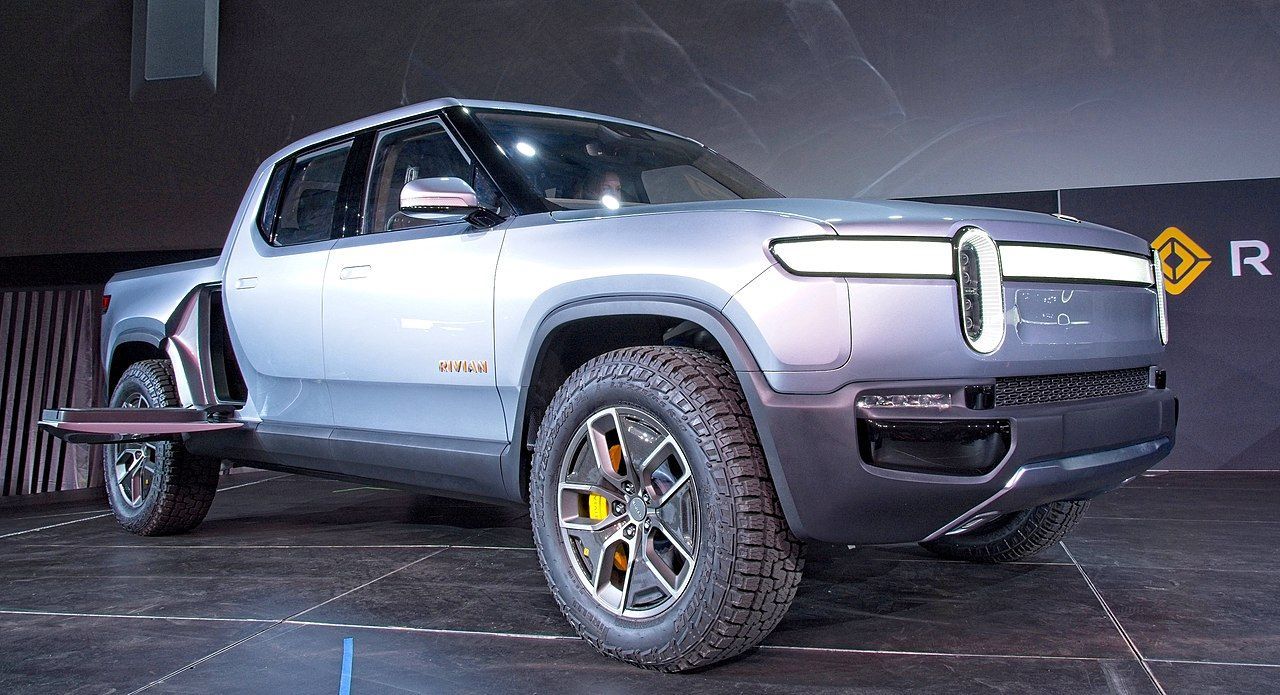
Gone are the days of Chevy and Ford holding the title for America’s most sought-after pickups. As the popularity of electric vehicles (EVs) continues to gain traction, more drivers are opting to buy electrified trucks. Hands down, two of the most talked-about contenders in the EV segment are Tesla and Rivian. Not only are these companies threatening the long-standing dominance of their combustion-engine competitors, but they’re also preserving the planet. But is the Tesla Cybertruck or the Rivian R1T the better option for you? While both of these pickups are electric, they couldn’t be more different. Luckily, the EV enthusiasts at Ultimate Window Tinting are happy to help. Keep reading to learn how the Cybertruck stacks up to the R1T. Price One of the biggest differences between the Tesla Cybertruck and the Rivian R1T is their price tags. The R1T has a starting price of $67,500 . The Rivian R1T Launch Edition, which is currently sold out, and the Adventure Edition both cost $73,000 . However, R1T buyers will receive a $7,500 EV tax credit , which Tesla is no longer eligible for. The entry-level price for a Tesla Cybertruck is $39,000 . The Dual Motor AWD model costs $49,900 and the Tri-Motor AWD model costs $69,900 . Design and Specifications Regarding design, the R1T and Cybertruck wildly differ. Rivian has taken a more familiar design approach, making its EV resemble traditional gas-powered pickups. The R1T features a chunky body, a large load bay, and a four-door layout. Meanwhile, the Cybertruck’s futuristic, sci-fi design is guaranteed to turn heads. Tesla’s truck boasts more angles than your high school geometry class. As for specifications, the Cybertruck has a higher ground clearance ( 16 inches vs 14 inches ), max payload ( 3,500 lbs. vs 1,750 lbs. ), and a longer bed ( 6.5 feet vs 4.5 feet ) than the R1T., Thanks to its lightweight construction, the R1T is much faster than the single- and dual-motor Cybertrucks, topping out at 125 mph . But Cybertruck’s Tri-Motor version beats all R1T models at 130 mph . Construction The Tesla Cybertruck is outfitted with cold-rolled stainless-steel body panels. The truck’s 3 mm-thick steel body is what the automaker has dubbed its “high-strength glass armor.” The R1T has a high-strength steel chassis. Its body is made from a combination of carbon fiber and aluminum body panels. This makes the R1T significantly lighter than Tesla’s EV. Interior While both cabins are minimalistic, the R1T’s interior is much more conventional than that of the Cybertruck. Tesla outfitted its Cybertruck with a yoke-shaped steering wheel, similar to those found in airplanes. The Cybertruck has six seats arranged in two rows of three. It also features a large 17-inch touchscreen mounted to the center of the dashboard. The R1T seats five, with two seats in the front and a three-seat bench seat in the rear. It also features a central touchscreen. Features Both trucks have innovative features that make them enjoyable and safe to drive. The Cybertrck offers 110V and 220V power outlets, an air compressor, a driver-assist system, full self-driving technology, and autopilot hands-free driving mode. The Rivian R1T offers a hand-free driving mode, a “ gear-tunnel ” that makes it easy to stash your stuff, a removable roof option, and natural-grained ash wood accents. Cybertruck vs R1T’s Range Depending on what version you buy, the Tesla Cybertruck has range distances of 250, 300, and 500 miles. The different Rivian R1T models have ranges of 230, 300, and 400 miles. The Cybertruck’s 250 kW charging rate is greater than that of the R1T ( 160 kW ). Rivian R1T Vs Tesla Cybertruck: Towing Capacity The Tri-Motor Cybertruck version can tow up to 14,000 pounds and has a maximum payload of 3,500 pounds. The Rivian R1T can tow up to 11,000 pounds and has a maximum payload of 17, 600 pounds. Tesla Cybertruck vs Rivian R1T: Which One Should You Choose? While both electric trucks are great options for drivers who want to reduce their carbon footprints, the Cybertruck offers more bang for your buck. That’s because of its advanced features, more affordable price, and powerful capabilities. However, the Cybertruck may not be the best option for people who want to drive a more traditional-looking pickup. That crown goes to Rivian. Keep Your Electric Truck Protected Whichever EV you choose to buy, it’s important to preserve its paint. Ultimate Window Tinting’s clear bra solutions will protect your Rivian or Tesla Cybertruck’s paint from scrapes, scratches, corrosion, fading, and swirl marks. Additionally, our window tinting solutions will help you get more life out of your battery. That’s because our tints keep your cabin cool so you don’t have to blast the A/C. To learn more about our high-quality services, contact us today by calling (360) 686-2990 .